Management of rules in the case of several work plans
In Illustrator, as in other Adobe Creative Suite software, the origin of the ruler is defined by default in the upper left corner of the file or the first work plane. The value of the rulers is continuous on the following work planes: it measures all the planes. When you want independent rule units from one plan to another To do this, simply right-click on the ruler bar and select "Ruler" Switch to the work plan rules ." Once this step is done, by selecting for example work plane #2, the origin of the ruler will start in the upper left corner of this plane. The same will happen automatically when clicking on work plane #1, etc. " Switch to global rules "This will return to the default rules configuration.

The potential of benchmarks and grids
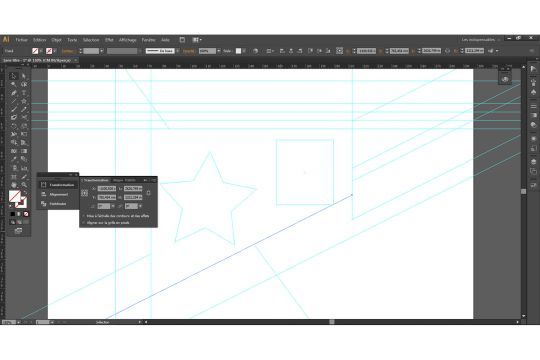
? By combining the " Alt " to " click and drag "If you use the vertical ruler bar, you get a horizontal marker, and vice versa.
? In Illustrator, the markers are considered as objects . It is therefore possible to manipulate them as such:
- duplicate them with the " Alt " (in the same way that one copies a shape, for example) ;
- group them on a specific layer in order to hide or lock them in one click;
- repeat a trip ;
- align or position them precisely on the work surface;
- exercise a rotation.
? The function reference rotation is a method that is not yet well known. It is obtained by selecting the marker, then in the " Transformation "Simply change the tilt angle to the desired value.
? It is also possible to cut a marker with the tool " scissors ". This trick can be useful to gain readability in the case of a large number of markers within the document.
? If the rules behave like objects, any object can reciprocally become a landmark . To do this, select it and go to the menu " Display/ Markers/ Create markers ". This method can be used, for example, to easily create internal margins in the same way as in In Design. The advantage of this technique is that any new shape is magnetized to the margin frame and allows faster and more accurate positioning. However, the option " point magnetism " in the panel " Properties "This is the only way to ensure that the system is working properly.

? On some occasions, the commented markers are also very helpful in achieving flawless alignments.
? In the case of executing a logo, icon, or any other job requiring great finesse, alignment on the pixel grid is very efficient. To change the keyboard increment, the grid must be magnetized to the pixel (in " Properties ") and the keyboard increment preferences are set to 1px. Thus, the selected object moves from pixel to pixel with the directional arrows.


