1) Changing the size and color of a fill tool
This manipulation works on the Brush (B), the Water Drop, the Duplication Pad (S):
- Alt + right click A left to right movement changes the diameter of the tool, while an up and down movement changes the hardness;
- Shift + Alt + right click displays the dropper and the color palette.
In general on Photoshop, by pressing the name of a tool option, you can also quickly adjust the values by dragging the mouse from left to right. In combination with the Alt the setting gains in precision.
2) Handling layers
On a document containing many layers, to display only one layer, click on the "eye" of the palette while pressing Alt . The other layers are hidden. To display them again, simply click on the eye icon + Alt .
Alt is the option that allows you to duplicate most of the elements: layers, merge masks, shapes, lines, etc.).
Namely, it is now possible to copy and paste various layers to another Photoshop document.
3) Change the color of an element
Alt + Backspace applies the color defined in the foreground to :
- a form ;
- a text layer ;
- a solid color layer.
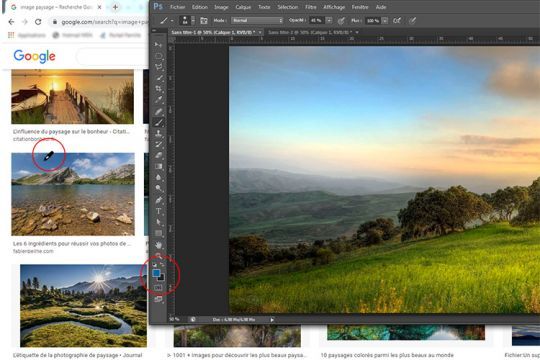
4) Select a color outside of Photoshop
Arrange the Photoshop window so that the underlying windows are visible. By pressing Alt + left click The tool takes on the appearance of the eyedropper. Move the mouse to a color area of another window on the screen. A right click allows you to set this color as the foreground in Photoshop.
5) Merging layers
More Ctrl + Alt + Shift + E merges all the layers contained in the document onto a new layer. In the same idea, Ctrl + Alt + E performs a merge only on the selected layers.

Other tips are available at the adobe Max virtual conference from October 26 to 28.
